How to configure Reverse Proxy on Windows IIS

Much like Nginx, IIS is a web server on Windows that allows you to configure to serve different kinds of purpose. From serving static files, to hosting a php application directly using, etc. However, IIS isn't as straight forward as Nginx when it comes to setting up a reverse proxy. This artcile will show you how to setup reverse proxy in a Windows IIS server.
Step 1. Install Routing Plugins
By default, IIS does not come with reverse proxy routing capability. To enable it, we need to manually install certain plugins first. Now click the links below to download & install the plugins.
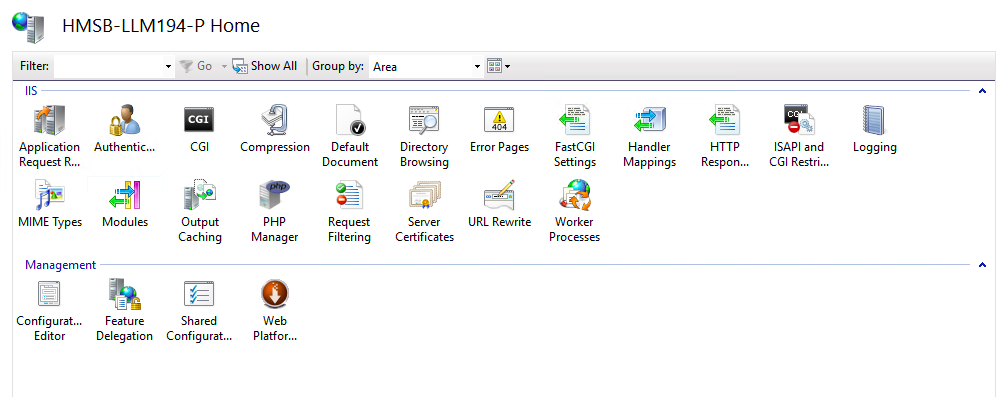
After installing the plugins, you should see an option URL Rewrite added to the IIS dashboard under Default Web Site.

Step 2. Add a reverse proxy rule
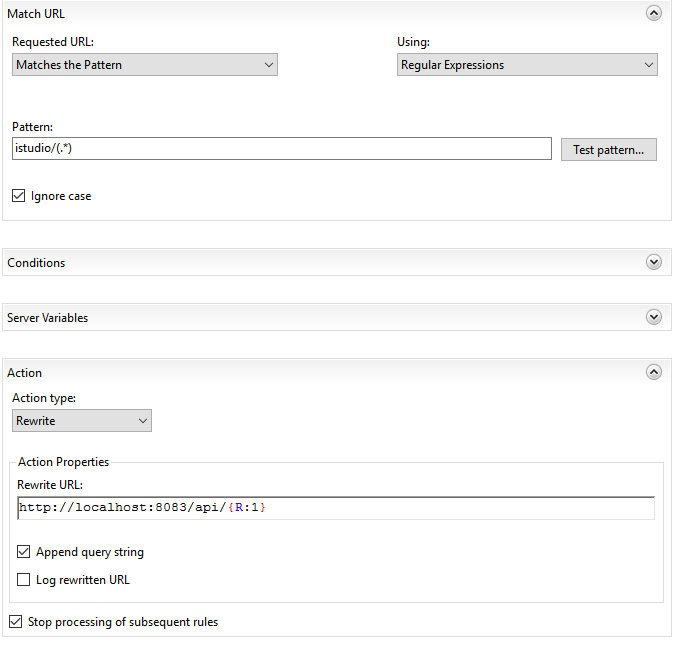
Now, click inside URL Rewrite option. Right toolbar > Select Actions > Add Rule(s)... > Inbound rules > Blank rule. You should see something like this:

- Pattern - URL pattern in regex form to match for reverse proxy routing
- Conditions - (Optional) Extra conditions to complement Pattern
- Server variables - ignore this
- Action - Action to perform if the URL is matched
- Rewrite URL - URL to route to if matched. Eg. route to a local service running port 3000 (http://localhost:3000)
Note:
Patternuses regular expression format
In Pattern, make sure to match property the url for reverse routing. If it is to match all, simply set pattern as (.*).
Everything inside Pattern wrapped with parantheses can be referenced later in Rewrite URL box in sequence ({R:0}, {R:1}, etc).
For example in the image above, request like http://myserver.com/istudio/api/login will be routed to http://localhost:8083. The following variables will be created.
- {R:0} -
istudio/api/login - {R:1} -
api/login
Now, follow the configuration like in the image above and modify the Pattern and Rewrite URL accordingly.
Once you have done. Click Apply at the right toolbar to apply the changes.
Step 3. Enable Proxy settings in IIS
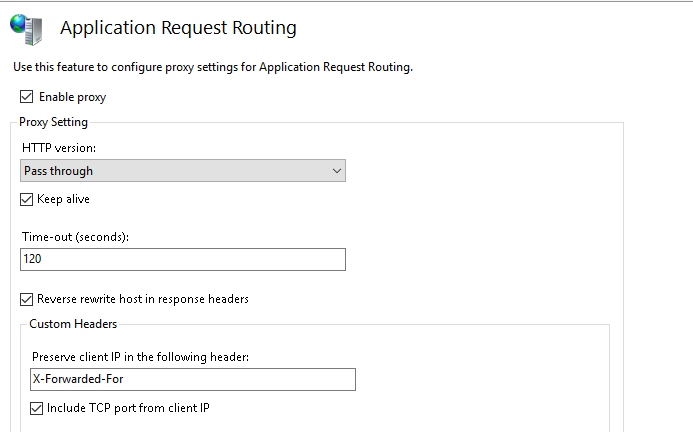
Finally, you need to enable IIS proxy settings. It's not on by default.
Follow the steps below.
- Click the root leve of connection:

- Select
Application Request Routing Cacheoption - At the right toolbar, select
Server Proxy Settings... - Check
Enable proxy
Conclusion
There's all you need to enable reverse proxy in IIS
Have fun.