Building a MFE with AWS Cloudfront + S3

Building a Monorepo MFE with Nx and AWS CloudFront + S3
Introduction
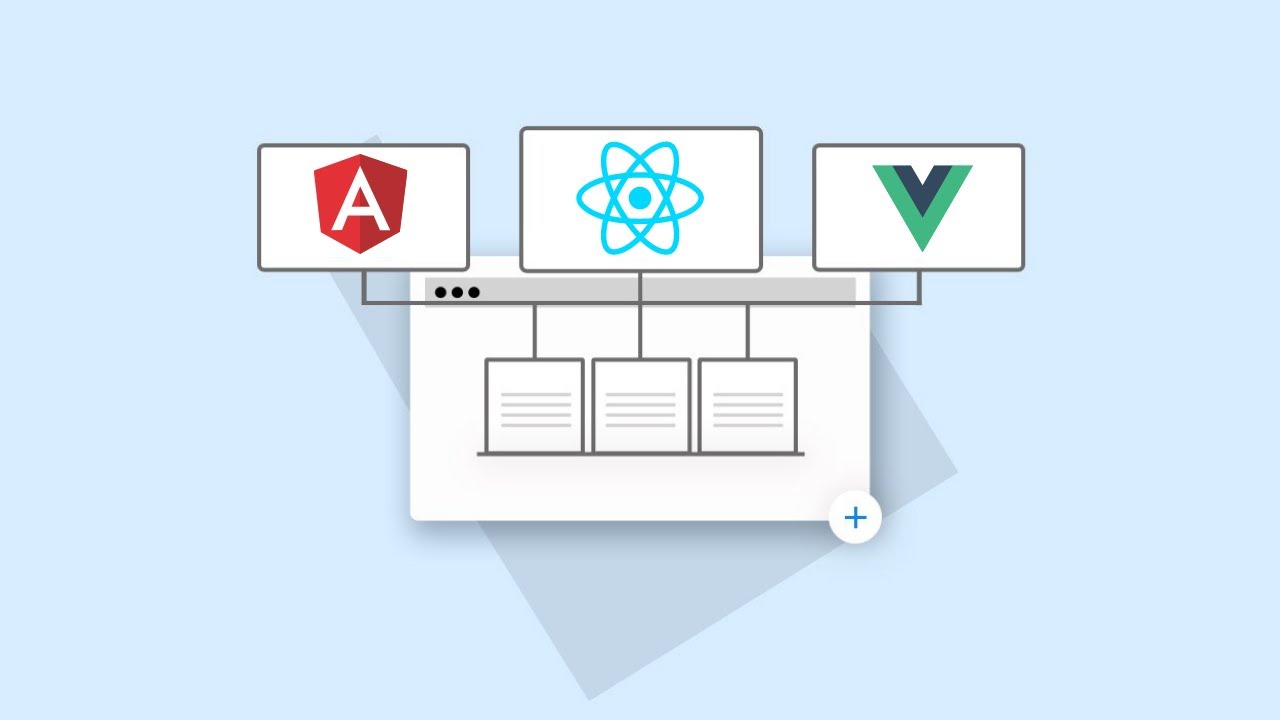
Micro Frontend (MFE) architecture has become a popular approach for scaling frontend applications. By splitting the frontend into independent modules, teams can work on different parts of the app simultaneously. In this blog, I'll walk you through how I built a monorepo MFE using Nx, AWS S3, and CloudFront.
This setup consists of:
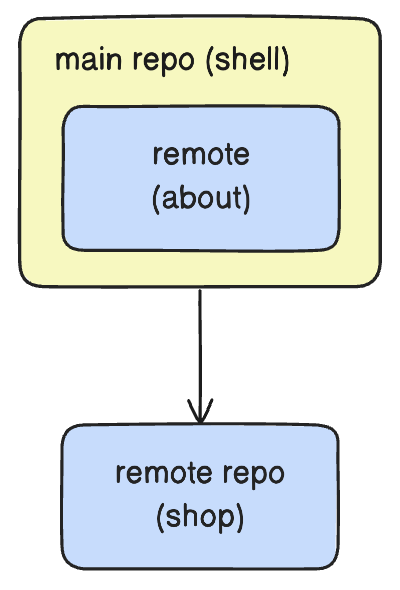
- Shell App (Host application)
- Shop App (Remote MFE in a separate repo as a Git submodule)
- About App (Remote MFE in the main monorepo)
I'll cover how to:
- Scaffold an Nx-based MFE project
- Configure Git submodules for the remote
shopapp - Build and deploy the apps to an AWS S3 bucket & CloudFront
Architecture
Overall MFE architecture:

MFE Git repository structure:

Step 1: Setting Up an Nx Monorepo
First, create a new Nx workspace configured for an Angular MFE setup:
npx create-nx-workspace nx-monorepo-mfe --preset=apps
cd nx-monorepo-mfe
Add the MFE Module Federation plugin:
nx add @nx/angular
Now, generate the shell and remote apps:
nx g @nx/angular:host apps/shell

nx g @nx/angular:remote apps/about --host=shell
The
shellapp serves as the main host, dynamically loading remote apps (aboutandshop).
Step 2: Add a Remote App about
Let's generate our first remote app for the About page:
nx g @nx/angular:remote apps/about --host=shell
Verify that it is registered in the shell's module-fedration.config.ts.
const config: ModuleFederationConfig = {
  name: 'shell',
  remotes: ['shop', 'about'],
};
Step 3: Adding a Remote shop App as a Git Submodule
Since the shop app resides in a separate repository, we’ll add it as a Git submodule.
3.1 Generate shop remote app
Similar to how we generated about app above, let's generate the shop remote app with Nx's Angular generator:
nx g @nx/angular:remote apps/shop --host=shell
This will generate a remote app shop in apps/shop/ directory and register it in the shell's module-federation.config.ts.
const config: ModuleFederationConfig = {
  name: 'shell',
  remotes: ['shop'],
};
3.2 Initialize shop Git submodule repository
Let's initialize the remote app apps/shop as another Git repository.
cd apps/shop
git init
git remote add origin <GIT_REPO_URL_FOR_SHOP>
Navigate to the root of the monorepo and add it to the .gitmodules
git submodule add <GIT_REPO_URL_FOR_SHOP> apps/shop

# this track the changes for the latest commit of `shop` repo.
git add apps/shop
Step 4: Create an AWS S3 Bucket
In order to host our MFE app, we need to enable the static site hosting in the S3 bucket.
Sample terraform script:
# ==================== S3 ====================
resource "aws_s3_bucket" "mfe_app" {
  bucket = "<your_bucket_name>"
}
resource "aws_s3_bucket_policy" "mfe_app_policy" {
  bucket = aws_s3_bucket.mfe_app.id
  policy = jsonencode(
    {
      Version = "2012-10-17"
      Statement = [
        {
          Sid       = "PublicReadGetObject"
          Action    = "s3:GetObject"
          Effect    = "Allow"
          Principal = "*"
          Resource  = "${aws_s3_bucket.mfe_app.arn}/*"
        },
      ]
    }
  )
}

# Enable static website hosting
resource "aws_s3_bucket_website_configuration" "mfe_app" {
  bucket = aws_s3_bucket.mfe_app.id

  index_document {
    suffix = "index.html"
  }

  error_document {
    key = "error.html"
  }
}
resource "aws_s3_bucket_public_access_block" "mfe_app" {
  bucket                  = aws_s3_bucket.mfe_app.id
  block_public_acls       = false
  block_public_policy     = false
  ignore_public_acls      = false
  restrict_public_buckets = false
}
Step 5: Building and Deploying to AWS S3
Each app needs to be built and deployed to S3 buckets.
First, let's build the apps. This will generate the built arfifacts in dist/apps/.
nx build shell
nx build about
nx build shop

# alternatively, you can build all with:
nx run-many -t build
Then deploy each app to S3 whenever necessary.
aws s3 sync dist/apps/shell s3://my-mfe-bucket/shell --delete
aws s3 sync dist/apps/about s3://my-mfe-bucket/about --delete
aws s3 sync dist/apps/shop s3://my-mfe-bucket/shop --delete
Step 6: Setting Up CloudFront
Now that we have deployed our MFE app to the S3. Technically we can already access it directly via the S3 public url, eg: http://<your-bucket-name>.s3-website-ap-southeast-1.amazonaws.com, but the redirection will not work properly when reloading the page.
Hence, we need to setup a CloudFront distribution and configure it to serve from the S3 bucket:
Terraform script:
resource "aws_cloudfront_origin_access_control" "oac" {
  name                              = "my-mfe-s3-access-control"
  origin_access_control_origin_type = "s3"
  signing_behavior                  = "always"
  signing_protocol                  = "sigv4"
}

# CloudFront distribution
resource "aws_cloudfront_distribution" "mfe_cloudfront" {
  # our MFE shell app is hosted in a S3 directory instead of root /, we need to tell CF where to look for index.html
  default_root_object = "shell/index.html"
  enabled             = true

  origin {
    # replace `<your_s3_bucket>` with your bucket name
    domain_name = "<your_s3_bucket>.s3-website-ap-southeast-1.amazonaws.com"
    origin_id   = "my_s3_origin"
    origin_access_control_id = aws_cloudfront_origin_access_control.oac.id
  }

  custom_error_response {
    error_caching_min_ttl = 10
    error_code            = 403
    response_code         = 200
    response_page_path    = "/shell/index.html"
  }
  custom_error_response {
    error_caching_min_ttl = 10
    error_code            = 404
    response_code         = 200
    response_page_path    = "/shell/index.html"
  }

  default_cache_behavior {
    allowed_methods = [
      "GET",
      "HEAD",
    ]
    cached_methods = [
      "GET",
      "HEAD",
    ]
    target_origin_id         = "my_s3_origin"
    viewer_protocol_policy   = "redirect-to-https"
  }

  restrictions {
    geo_restriction {
      restriction_type = "none"
    }
  }

  viewer_certificate {
    cloudfront_default_certificate = true
  }
}
This ensures requests are routed correctly to the MFE remotes.
Summary
By following these steps, we:
- ✅ Created an Nx monorepo with an MFE setup
- ✅ Integrated a Git submodule for the
shopremote app - ✅ Built and deployed each MFE to AWS S3
- ✅ Used AWS CloudFront to route requests dynamically
This architecture enables scalability, independent deployments, and improved maintainability for micro frontends.


