3 posts tagged with ".NET"

View All Tags

.NET Unit Test with xUnit

· 4 min read
Guster
Full-stack Staff Engineer

image

Introduction

Unit testing in a .NET project requires a slightly different approach compared to other web frameworks like Spring Boot, Ruby on Rails, Node.js, or Laravel.

Typically, in these frameworks, we integrate a unit testing library—such as jest for Node or rspec for Rails—directly into the source project via the package manager manifest (package.json or Gemfile). These package managers often allow you to specify the environment for installing dependencies (e.g., npm install --dev).

In .NET, however, this isn't the case. To integrate unit tests, we need to restructure the project.

For example, assuming you have an existing .NET project with this structure.

/my-todo-app
my-todo-app.sln
/src
MyClass.cs

You will need to restructure the project similar to

/my-todo-app
my-todo-app.sln
/src
MyClass.cs
my-todo-app.csproj
/tests
MyClassTests.cs
test.csproj

Ensure there's no nested .csproj structure—that is, avoid placing a .csproj file inside a parent folder that already contains another .csproj. This prevents the error Duplicate global::System.Runtime.Versioning.TargetFrameworkAttribute.

Example of a well-structured .NET project

MySolution/

├── MySolution.sln # Solution file

├── src/ # Source code directory
│ ├── MyApp/ # Main application project
│ ├── MyApp.csproj # Project file for MyApp
│ ├── Program.cs # Entry point for the application
│ ├── Startup.cs # Configuration and services setup
│ ├── Controllers/ # MVC or API controllers
│ │ └── HomeController.cs # Example controller
│ ├── Models/ # Application models
│ │ └── UserModel.cs # Example model
│ └── Services/ # Business logic services
│ └── UserService.cs # Example service

└── tests/ # Test projects directory
├── MyApp.Tests/ # Unit test project for MyApp
├── MyApp.Tests.csproj # Project file for unit tests
├── UserServiceTests.cs # Unit tests for UserService
└── HomeControllerTests.cs # Unit tests for HomeController

Create a unit test

Now let's dive into how it works. Assume we have a service class AuthService that's responsible for generating and decoding JWT tokens.

public class AuthService
{
public string GenerateJwtToken(User user)
{
var tokenHandler = new JwtSecurityTokenHandler();
var key = Encoding.ASCII.GetBytes("jwt_secret_key");
var tokenDescriptor = new SecurityTokenDescriptor
{
Subject = new ClaimsIdentity(
[
new Claim("id", user.Id.ToString())
]),
Issuer = "john",
Expires = DateTime.UtcNow.AddHours(1),
SigningCredentials = new SigningCredentials(new SymmetricSecurityKey(key), SecurityAlgorithms.HmacSha256Signature)
};
var token = tokenHandler.CreateToken(tokenDescriptor);
return tokenHandler.WriteToken(token);
}

public JwtPayload DecodeJwtToken(string token)
{
var handler = new JwtSecurityTokenHandler();
var payload = handler.ReadJwtToken(token).Payload;
return payload;
}
}

Create a test class AuthServiceTest under /tests directory

public class AuthServiceTest
{
[Fact]
public void TestGenerateJwtToken()
{
var user = new User { Id = 1, Email = "lorem@ipsum.com" };
var authService = new AuthService();
var token = authService.GenerateJwtToken(user);
var decodedPayload = authService.DecodeJwtToken(token);

// assert that the JWT token is not null
Assert.NotNull(token);

// assert that the claim "id" is as expected
Assert.Equal("1", decodedPayload["id"].ToString());
}
}

Start testing

Now that we have created a sample test, let’s run it.

  • Run the following command to run all unit tests in the project

    dotnet test
  • To run a specific test, use the --filter option. For more advanced filtering techniques, visit the official documentation.

    dotnet test --filter "AuthServiceTest"
  • A summary of the test results will be shown

    Starting test execution, please wait...
    A total of 1 test files matched the specified pattern.

    Passed! - Failed: 0, Passed: 1, Skipped: 0, Total: 1, Duration: < 1 ms - test.dll (net8.0)

Summary

Unit testing is an essential practice in software development, and xUnit provides a robust framework for .NET developers to implement effective tests. By following the structure and examples outlined in this guide, you can create comprehensive unit tests for your .NET applications. Remember that regular testing helps catch bugs early, improves code quality, and increases confidence in your codebase. As you become more familiar with xUnit, you'll find it an invaluable tool in your development process.

Speedrun .NET + Angular

· 5 min read
Guster
Full-stack Staff Engineer

image

Introduction

Recently, I had an initial interview with a new company that uses Angular and .NET as its tech stack. Frankly, these two frameworks are pretty unfamiliar to me. I used to work with Angular.js back when it was still v1, which was about 8 years ago. I remember it was renamed to just Angular starting from v2, and now it's already at v18.

What about .NET? Even worse, I have never used it in my entire life! In fact, I don't know C# at all. Though I've heard a lot about it and that it's similar to Java.

Long story short, regardless of whether I advance to the next interview, I decided to take this as an opportunity to learn some new skills. However, I don't want to spend too much time learning. So, I decided to start a speed run on learning .NET and Angular.

How I learn

How I usually learn a new framework or programming language is by building a sample project. Here are a few pros of this approach:

  • Less boring - You get to see your half-baked product evolve while going through the tutorial.
  • Learn based on the features you need - It takes time to learn everything, especially with a complex framework like .NET. It's better to learn as you go. For example, if you need user authentication or a database migration.
  • Feels accomplished once the sample project is done and deployed for showcasing!

I have shared some of the notable points I learned from these frameworks here:

A Todo Project

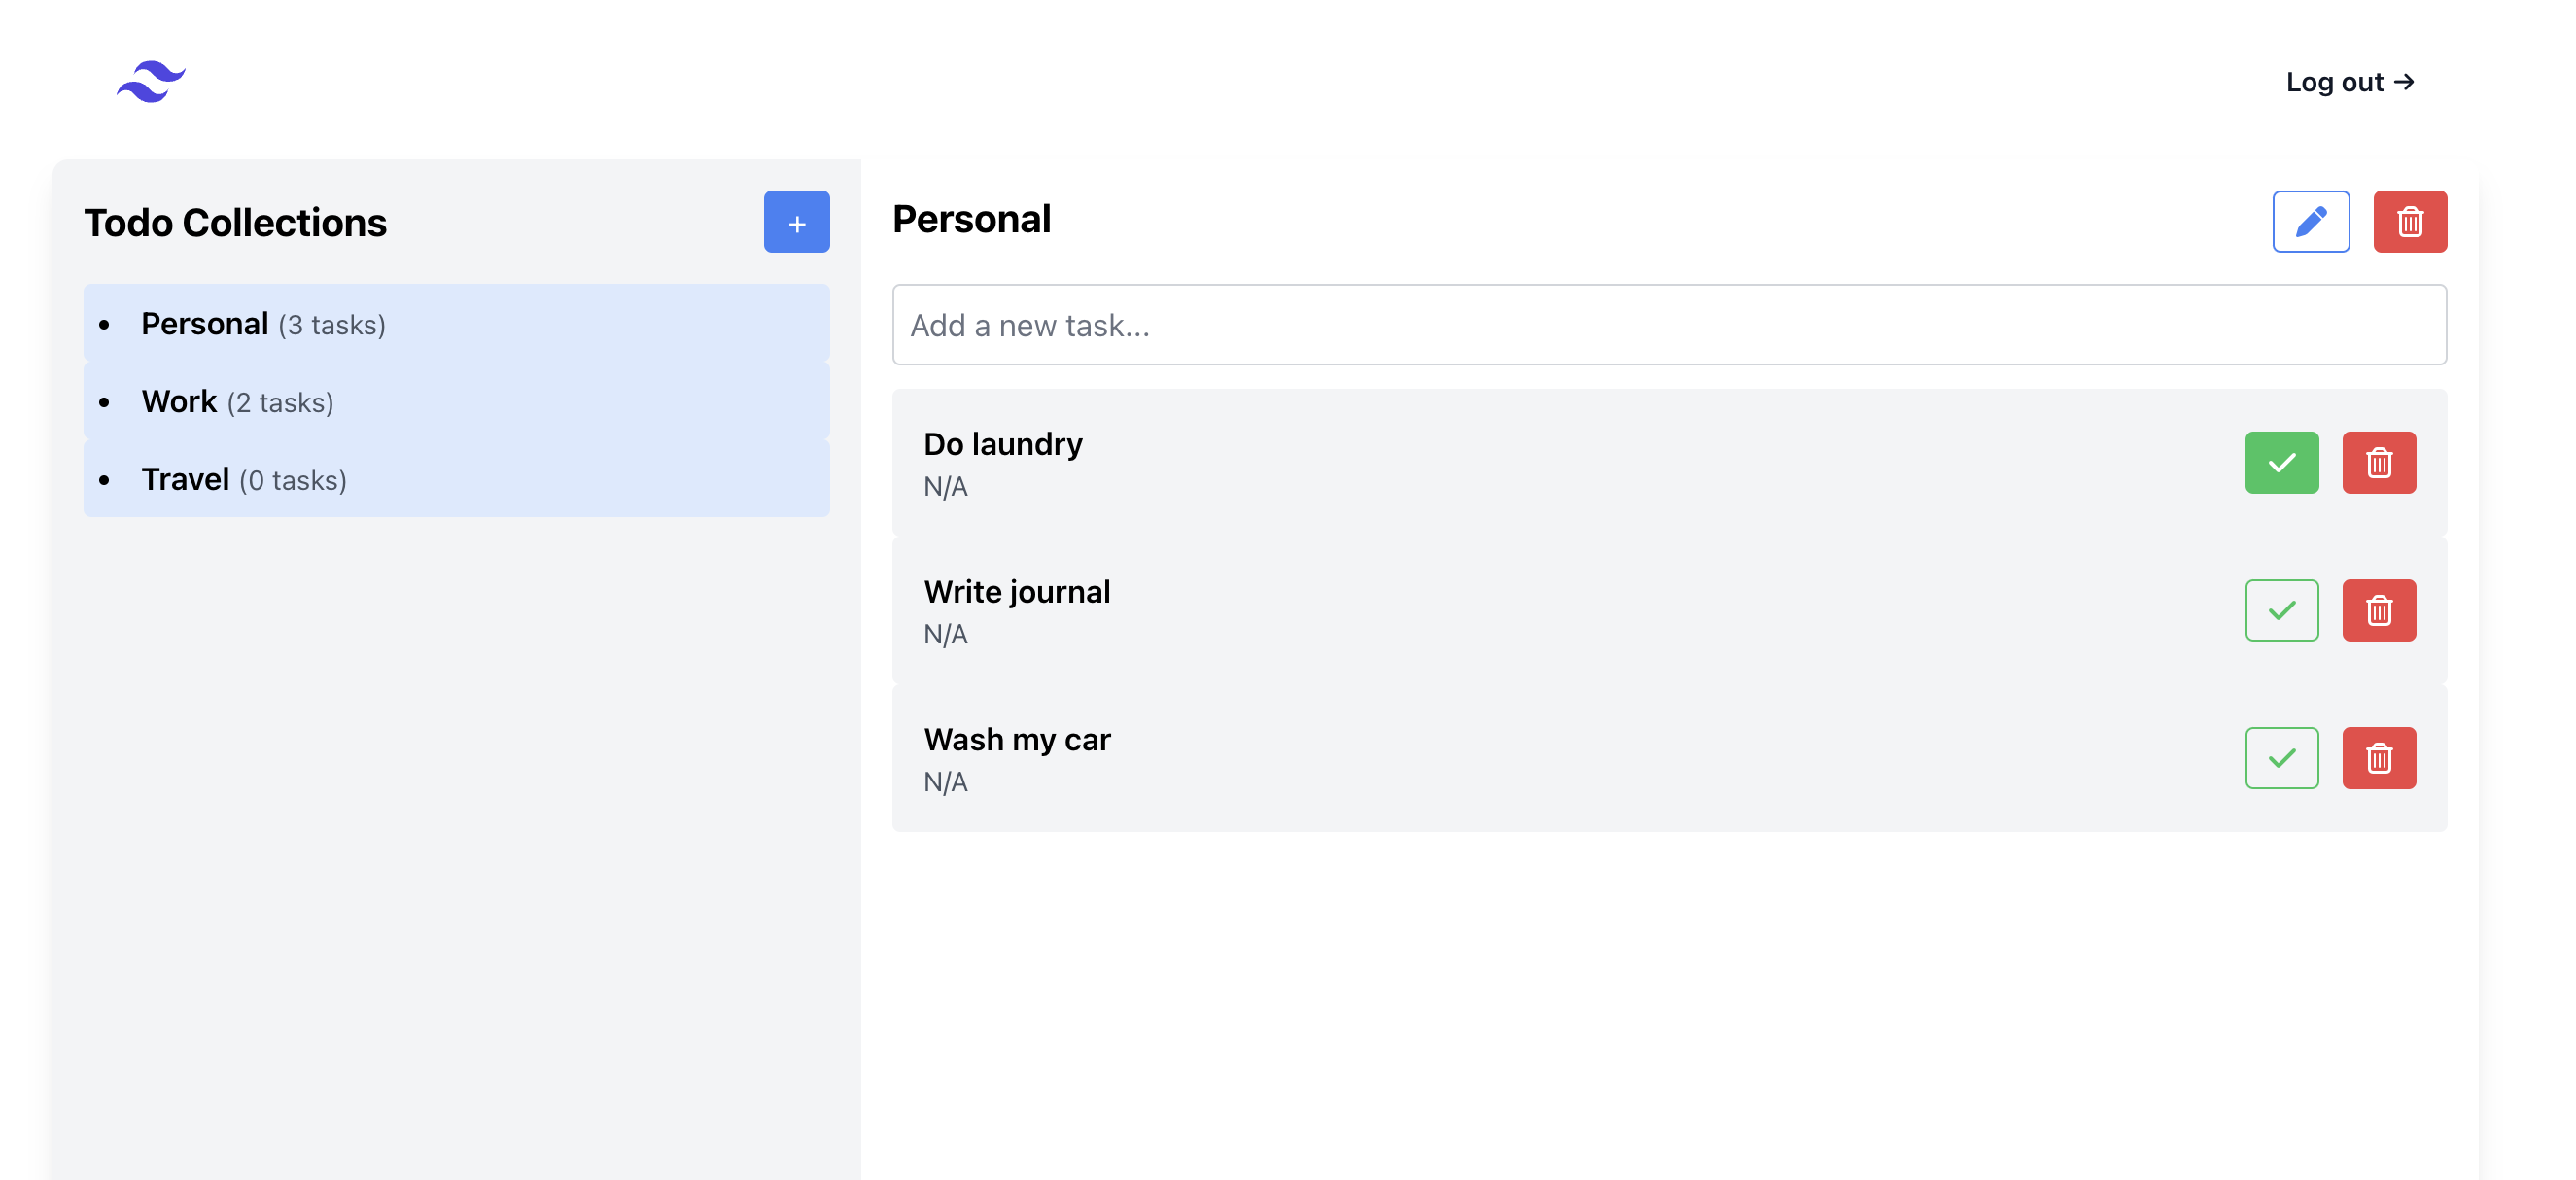
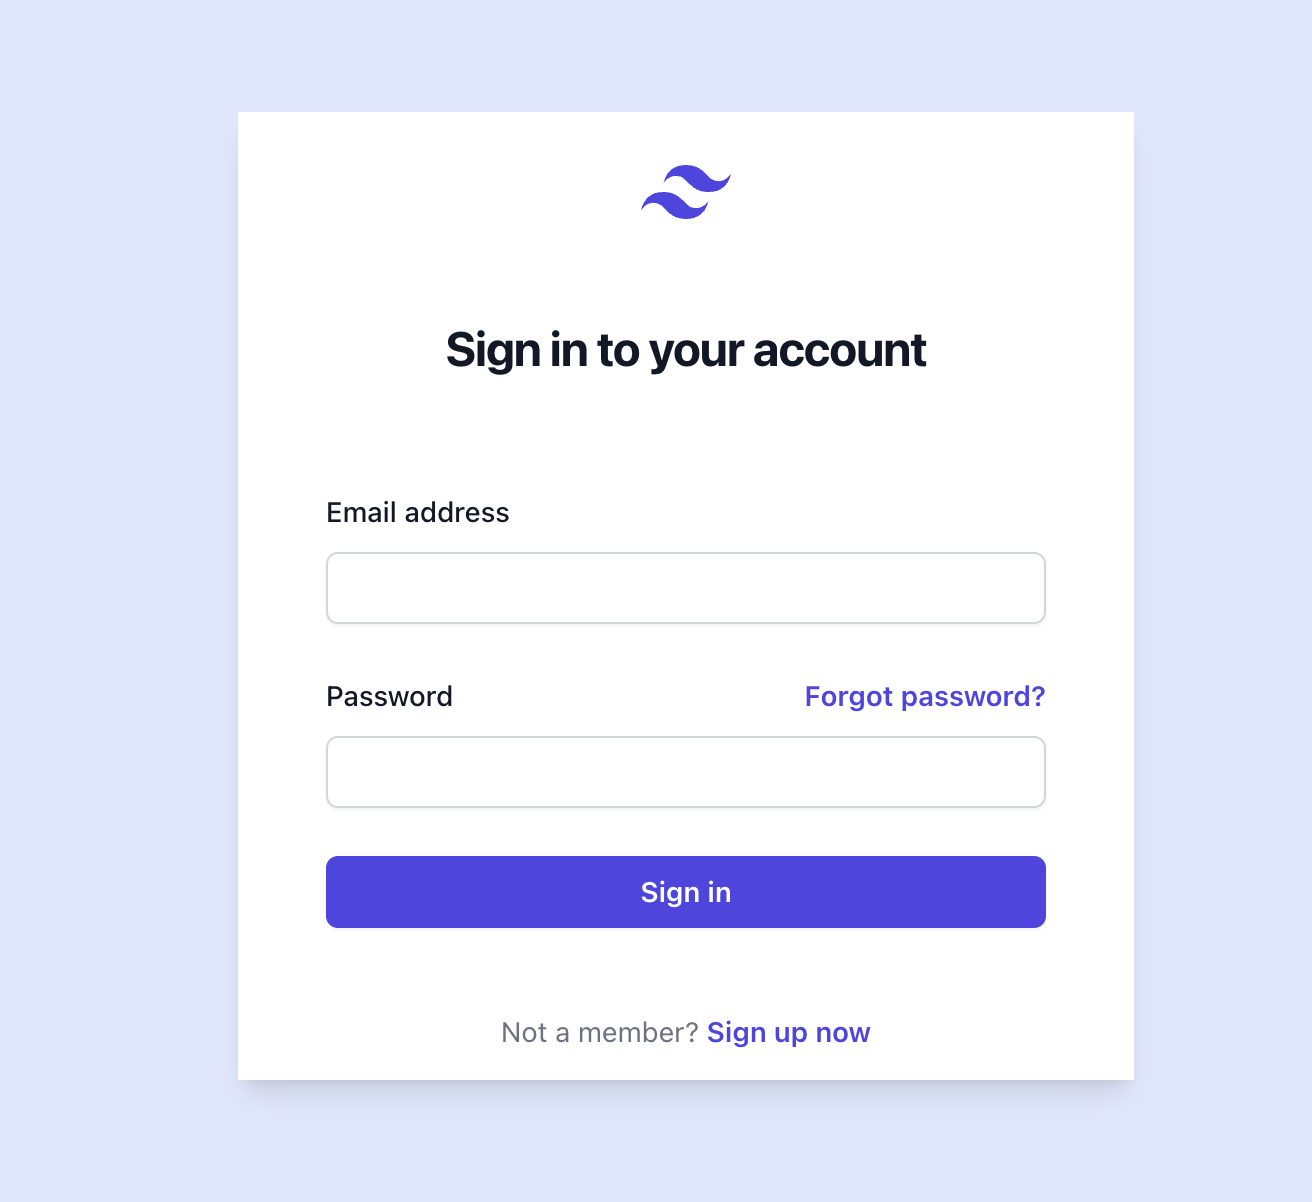
And so, I decided to build a simple Todo task list. This Todo will contain the following features and acceptance criteria:

  • A login page for user authentication
  • Users can create, read, update, and delete a collection (a group of tasks)
  • Users can create, read, update, and delete a task within a collection
  • A main page with a two-pane layout: the left pane shows a list of collections, and the right pane shows the selected collection’s tasks
  • Users must be authenticated to view the main page
  • Basic UI styling (tailwind for the rescue!)
  • Logout functionality

Deployment

Now that I have finished building the API and web app, I want to deploy them somewhere to showcase if needed. Since I already have AWS, I decided to deploy there.

I want it fast and simple, so here’s what I did:

  • Hosted the Angular app on an S3 bucket as a static site
  • Dockerized the .NET API and deployed it to an EC2 instance
  • Created a Postgres instance in RDS

I used Terraform to ease the process of provisioning these resources. Here’s a sample script.

# VPC, subnets, internet gateway, route table and security groups provisioning
# ...

# ==================== RDS ====================
resource "aws_db_instance" "my_rds" {
allocated_storage = 20
engine = "postgres"
engine_version = "16.4"
instance_class = "db.t3.micro"
db_name = "mydatabase"
username = "username"
password = "password"
vpc_security_group_ids = [aws_security_group.rds_sg.id]
db_subnet_group_name = aws_db_subnet_group.my_db_subnet_group.name
skip_final_snapshot = true
publicly_accessible = false
}
resource "aws_db_subnet_group" "my_db_subnet_group" {
name = "my-db-subnet-group"
subnet_ids = [
aws_subnet.private_subnet_a.id,
aws_subnet.private_subnet_b.id
]
}

# ==================== EC2 ====================
resource "aws_instance" "dotnet_todo_instance" {
ami = "ami-0a6b545f62129c495"
instance_type = "t2.micro"
subnet_id = aws_subnet.public_subnet_a.id
vpc_security_group_ids = [aws_security_group.ec2_sg.id]
tags = {
Name = "dotnet-todo-ec2"
}
}

# ==================== S3 ====================
resource "aws_s3_bucket" "dotnet_todo_web" {
bucket = "dotnet-todo-web"
}
resource "aws_s3_bucket_policy" "dotnet_todo_web_policy" {
bucket = aws_s3_bucket.dotnet_todo_web.id
policy = jsonencode(
{
Version = "2012-10-17"
Statement = [
{
Sid = "PublicReadGetObject"
Action = "s3:GetObject"
Effect = "Allow"
Principal = "*"
Resource = "${aws_s3_bucket.dotnet_todo_web.arn}/*"
},
]
}
)
}

Result

Screenshot 2024-08-19 at 10.34.42 PM.png

Screenshot 2024-08-19 at 10.34.27 PM.png

Concluding Thoughts

Overall, it took me roughly one week to learn Angular, .NET, and complete the project. From a developer's perspective, the experience was quite smooth and easy. I found Angular's opinionated structure to be particularly beneficial. Its out-of-the-box common libraries saved me a significant amount of time that I would have otherwise spent searching for third-party solutions. This allowed me to focus more on building the actual features of my project rather than dealing with setup complexities.

When it comes to .NET, although I don’t particularly like C#’s Pascal-case naming conventions and its syntax formatting, I must admit that .NET is very easy to set up, develop, and build. I found the CLI and generators to be especially helpful tools that streamlined the development process. These tools provided a robust foundation, making it easier to manage and organize the codebase efficiently.

I built a simple todo for this project, but the learning experience has inspired me to explore more complex projects using Angular and .NET. I am definitely going to start building more with Angular and .NET in the future. The combination of these frameworks provides a powerful and efficient development environment that I am excited to continue exploring.

My .NET crash course

· 4 min read
Guster
Full-stack Staff Engineer

image

ASP.NET is a popular MVC framework for building web applications with C#. It's similar to Spring Boot if you come from a Java background and other web frameworks like Ruby on Rails and Laravel. Personally, I think it's more comparable to Spring Boot. We'll discuss this more later.

Follow the official documentation for installation.

File Structure

When I start learning a new framework, I usually relate its features to ones I'm familiar with. For example:

  • ApiController - Define a REST Controller, like @RestController in Spring Boot
  • DbContext - Think of it like a JpaRepository factory in Spring Boot, or ActiveRecord in ROR
  • Program.cs - The main class where the app initialisation is done, similar to SpringBootApplication
  • .csproj - Where we define the configs, dependencies, like the maven pom.xml or build.gradle in Java
  • /Migrations - A folder containing the db migration files, similar to the migrations in ROR.

C#

As a newcomer to C#, I found it surprisingly straightforward to learn. This is partly due to its similarities with other languages I'm familiar with, such as Java, JS, Kotlin, Ruby, and Dart. Here are a few examples:

  • The public, protected, private keywords
  • The var and const variable assignment keywords
  • The getter and setter shorthands get; set; in Kotlin
  • The attribute [...], which is equivalent to the annotation @ in Java
  • The async and await keywords

Development with VSCode

To run .NET directly from VSCode, you need to install these 2 extensions first.

Once these extensions are installed, please F5 to launch and debug.

CLI Commands

One thing I like about Ruby on Rails is its powerful CLI. It allows you to scaffold, generate classes, run migrations, and more. Fortunately, .NET also has its own CLI, and it’s actually pretty good.

Here are some commonly used commands in .NET:

  • dotnet new - Create a new .NET project

    dotnet new webapi --use-controllers -o dotnet-todo-api
  • dotnet add package - Add a package dependency

    dotnet add package Microsoft.EntityFrameworkCore.InMemory

    # If you are just starting, install these
    dotnet add package Microsoft.VisualStudio.Web.CodeGeneration.Design 1 ↵ guster@Gusters-MacBook-Air
    dotnet add package Microsoft.EntityFrameworkCore.Design
    dotnet add package Microsoft.EntityFrameworkCore.SqlServer
    dotnet add package Microsoft.EntityFrameworkCore.Tools
    dotnet tool uninstall -g dotnet-aspnet-codegenerator
    dotnet tool install -g dotnet-aspnet-codegenerator
    dotnet tool update -g dotnet-aspnet-codegenerator

    # for postgresql
    Aspire.Npgsql.EntityFrameworkCore.PostgreSQL
  • dotnet tool - Install a CLI extension

    # install the Entity Framework CLI tool for database migration
    dotnet tool install --global dotnet-ef
  • dotnet ef migrations - Generate a migration file

    dotnet ef migrations add InitialCreate
  • dotnet ef database update - Apply the migrations to database

  • dotnet aspnet-codegenerator - Scaffolding such as controller

    dotnet aspnet-codegenerator controller -name TodoItemsController -async -api -m TodoItem -dc TodoContext -outDir Controllers
  • dotnet run watch - Run the project with hot reloading

How-to List

  • How to enable CORS?

    If you are developing SPA with framework like React or Angular locally, you might hit CORS error when calling API to your local API server. To enable CORS, this is how you do it.

    How to

    In Program.cs, add the following codes.

    builder.Services.AddCors(options =>
    {
    options.AddDefaultPolicy(builder =>
    {
    builder.AllowAnyOrigin()
    .AllowAnyHeader()
    .AllowAnyMethod();
    });
    });

    var app = builder.Build();
    // ...
    app.UseCors();
  • Add a singleton

    In Program.cs, add the following changes, assuming you have created a service AuthService, then inject it in your class’s constructor as usual.

    builder.Services.AddSingleton<AuthService>()
  • Authorisation with JWT

    Setup

    To begin with, add the following service in your Program.cs

    builder.Services
    .AddAuthorization()
    .AddAuthentication(options =>
    {
    options.DefaultAuthenticateScheme = JwtBearerDefaults.AuthenticationScheme;
    options.DefaultChallengeScheme = JwtBearerDefaults.AuthenticationScheme;
    })
    .AddJwtBearer(options =>
    {
    options.TokenValidationParameters = new TokenValidationParameters
    {
    ValidateAudience = false,
    ValidateActor = false,
    ValidateIssuer = true,
    ValidateLifetime = true,
    ValidateIssuerSigningKey = true,
    LogValidationExceptions = true,
    ValidIssuer = "valid_issuer",
    IssuerSigningKey = new SymmetricSecurityKey(Encoding.UTF8.GetBytes("your_secret_key"))
    };
    });

    ...

    var app = builder.Build();

    // IMPORTANT: the order matters!
    app.UseAuthentication();
    app.UseAuthorization();

    Helper class to generate a JWT token (AuthService)

    public class AuthService
    {
    public string GenerateJwtToken(User user)
    {
    var tokenHandler = new JwtSecurityTokenHandler();
    var key = Encoding.ASCII.GetBytes("your_secret_key");
    var tokenDescriptor = new SecurityTokenDescriptor
    {
    Subject = new ClaimsIdentity(
    [
    new Claim("id", user.Id.ToString())
    ]),
    Issuer = "valid_issuer",
    Expires = DateTime.UtcNow.AddHours(1),
    SigningCredentials = new SigningCredentials(new SymmetricSecurityKey(key), SecurityAlgorithms.HmacSha256Signature)
    };
    var token = tokenHandler.CreateToken(tokenDescriptor);
    return tokenHandler.WriteToken(token);
    }
    }

    Protect your API endpoints

    In your Controller, add this annotation [Authorize] to any endpoint method that required authorisation. Default is anonymous allowed.